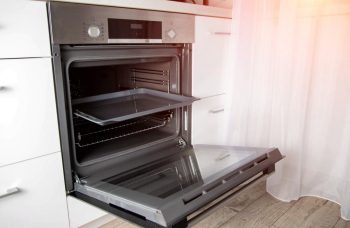
The GE Profile Oven is a state-of-the-art appliance that offers a variety of advanced features, including a built-in probe for precision cooking. This handy tool allows you to monitor the internal temperature of your food, ensuring that it is cooked to perfection every time. In this comprehensive guide, we’ll cover everything you need to know about using the probe on a GE Profile Oven, including step-by-step instructions, common mistakes to avoid, and tips for maintenance and troubleshooting.
To use the probe on a GE Profile Oven, first insert the probe into the thickest part of the meat, avoiding bones and fat. Connect the probe to the oven, then set the oven mode and temperature. Press the “Probe” button and set the desired internal food temperature. Start the cooking process, and the oven will shut off when the desired internal temperature is reached. Always clean the probe before and after each use to ensure accurate readings.
What is a Probe and its Functions?
The probe in a GE Profile Oven is essentially a built-in thermometer that provides accurate cooking results by measuring the internal temperature of your food. This feature is particularly useful when roasting or baking large cuts of meat, as it allows you to monitor the temperature without opening the oven door, preserving the oven’s heat and maintaining a consistent cooking environment.
The probe also has an auto shut-off feature. The oven will automatically turn off once the food has reached the desired internal temperature, preventing overcooking.
How to Install and Use the Probe
Inserting and using the probe in your GE Profile Oven is a straightforward process. Here’s a step-by-step guide:
- Insert the Probe into the Food: Identify the thickest part of the meat, avoiding bones, fat, and gristle, as they can affect the accuracy of the temperature reading. Insert the probe into the center of the thickest part of the meat, ensuring an equal thickness on all sides.
- Connect the Probe to the Oven: Locate the probe jack or socket in your oven and plug in the connector end of the probe, making sure it’s fully inserted.
- Set the Oven Mode: Press the “Convection Roast” button on the control panel (or the appropriate cooking mode for your oven model).
- Set the Oven and Probe Temperature: Use the numbered buttons on the control panel to set the desired oven temperature. Then press the “Probe” button and set the desired internal food temperature.
- Start Cooking: Press “Start” to begin the cooking process. The oven will automatically shut off when the desired internal temperature is reached.
Common Mistakes and How to Avoid Them
While using the probe is straightforward, there are a few common mistakes that users make which can affect the accuracy of the temperature reading or potentially damage the probe. Here are a few tips to avoid these issues:
- Incorrect Placement: Ensure the probe is inserted into the thickest part of the meat, avoiding bones, fat, and gristle. Incorrect placement can result in inaccurate temperature readings.
- Not Cleaning the Probe: Always clean the probe before and after each use to prevent cross-contamination and ensure accurate readings.
- Not Calibrating the Probe: Regularly calibrate the probe to ensure it is providing accurate temperature readings. Check your oven’s manual for calibration instructions.
- Using Tongs on the Probe: Use an oven mitt to remove the probe from the food after cooking, as it will be hot. Do not use tongs on the probe, as they might damage it.
Cleaning and Maintenance
Regular cleaning and maintenance of the probe are crucial to ensure its proper functioning and prolong its lifespan. After each use, clean the probe with hot soapy water, rinse it thoroughly, and dry it before storage. Avoid using abrasive cleaners or scrubbing brushes, as they may damage the probe.
Troubleshooting
If your probe is not functioning correctly, there are a few troubleshooting steps you can take:
- Check the Connections: Ensure the probe is properly connected to the oven and that it’s inserted correctly into the food.
- Inspect for Damage: Check the probe for any visible damage such as cracks or frayed wires. If damage is found, the probe may need to be replaced.
- Calibrate the Probe: If the probe is providing inaccurate readings, it may need to be recalibrated. Consult your oven’s manual for instructions on how to do this.
- Contact GE Support: If you’re unable to resolve the issue, contact GE’s customer support for further assistance.
In conclusion, using the probe on a GE Profile Oven can significantly enhance your cooking experience, ensuring your food is cooked to perfection every time. By following the above guidelines and tips, you’ll be a pro in no time. Happy cooking!
Frequently Asked Questions
Can I use the probe with all cooking modes in the GE Profile Oven?
No, the probe is typically used with the “Convection Roast” mode, but it may be compatible with other modes depending on your specific oven model. Always refer to your oven’s user manual to ensure proper use.
What should I do if the probe is not reading the correct temperature?
If the probe is not reading the correct temperature, it may need to be recalibrated. Check your oven’s manual for instructions on how to calibrate the probe. If recalibration doesn’t solve the issue, the probe may be damaged and need replacing.
Can I leave the probe in the oven while preheating?
It’s best to insert the probe after the oven has preheated to avoid potential damage from the high temperatures. The probe should be inserted into the food just before you start the cooking process.
Is the probe dishwasher safe?
While the probe is water-resistant, it is not recommended to clean it in the dishwasher. Instead, wash it by hand with hot, soapy water, rinse thoroughly, and dry before storing.
How deep should I insert the probe into the meat?
The probe should be inserted into the center of the thickest part of the meat, ensuring an equal thickness on all sides. Avoid inserting it into bones, fat, or gristle, as these can affect the accuracy of the temperature reading.

