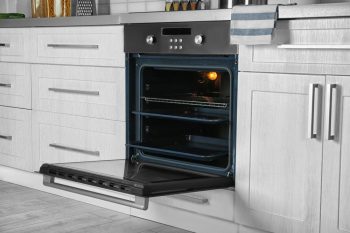
When it comes to making the most of your kitchen appliances, understanding how to use each feature to its full potential is key. One often overlooked yet incredibly useful feature is the warming drawer found in many General Electric (GE) ovens. This guide will provide a detailed overview of how to use the warming drawer on a GE oven, with practical examples, troubleshooting tips, and common mistakes to avoid.
To use the warming drawer on a GE oven, first ensure the oven is off. Open the drawer and turn on the warming drawer using the controls on the right side of the front frame. Set the desired temperature and moisture settings. Place your food in a heat-safe serving dish, then place it in the warming drawer. Allow time for the drawer to preheat if necessary, then close the drawer. Always remember to follow safety measures and best practices for optimal results.
What is the Warming Drawer?
The warming drawer is a separate compartment in your GE oven, designed to keep cooked food warm at serving temperature without overcooking it. It operates on an open-loop system, meaning there is no feedback to tell the control what the actual warming drawer temperature is. The temperature in the drawer depends on factors such as house voltage, room temperature, and control selection.
How to Use the Warming Drawer
To use the warming drawer on a GE oven, follow these steps:
- Ensure the oven is off: Make sure the oven is off and the warming drawer is cool.
- Locate the controls: Open the warming drawer and locate the controls on the right side of the front frame.
- Turn on the warming drawer: Press the ON/OFF switch to the ON position.
- Set the temperature: Turn the control knob to the desired temperature setting. The approximate temperature ranges are as follows:
- Lo: 140-170°F
- Medium: 170-210°F
- Hi: 215-250°F
- Set the moisture selector: If your model has a moisture selector, slide it to the open or closed setting depending on whether you want to keep foods moist or crisp.
- Prepare the food: Place the food in a heat-safe serving dish or keep it in its cooking container. For moist foods, cover them with a lid or aluminum foil. For crisp foods, leave them uncovered.
- Preheat if necessary: Allow time for the drawer to preheat if necessary. Preheating times are approximately 8 minutes for LOW, 15 minutes for MED, and 20 minutes for HIGH. Note that preheating is not necessary for proofing.
- Place the food in the warming drawer: Place the food in the warming drawer and close it.
Safety Measures When Using the Warming Drawer
When using a warming drawer, it is essential to consider several safety measures to prevent accidents and ensure proper operation. Here are some key safety precautions to keep in mind:
- Never store flammable materials, plastic items, or other objects in the warming drawer.
- Do not hang articles from any part of the appliance or place anything against the drawer.
- Never sit, stand, or lean on the warming drawer door to avoid damage to the appliance and ensure safety.
- Use only heat-safe utensils, such as glass, heat-proof glass-ceramic, ceramic, or earthenware, as others may break due to sudden temperature changes.
- Avoid touching the interior surfaces or the exterior area surrounding the door until it has cooled down, as they can be hot.
Best Practices for Using the Warming Drawer
To get the best results when using a warming drawer, follow these best practices:
- Preheat the drawer: Allow the drawer to preheat for optimal results. Preheating times are approximately 5 minutes for low, 10 minutes for medium, and 20 minutes for high settings.
- Use oven-safe cookware: Always use heat-safe dishes and oven-safe cookware when placing food in the warming drawer.
- Adjust humidity settings: Some warming drawers come with humidity controllers to prevent food from drying out. Adjust the humidity settings according to the type of food you’re keeping warm.
- Choose the right temperature: Set the warming drawer to medium or higher for dishes containing meat, poultry, or seafood. If you’re warming multiple types of food, use the setting for the food that requires the highest temperature and place the foods accordingly.
Troubleshooting Tips
If your warming drawer is not working properly, here are some common troubleshooting tips to help you identify and potentially resolve the issue:
- Check the controls and power supply.
- Check the circuit breaker or fuse.
- Monitor for overheating.
- If warming is insufficient, consider various factors like the type and thickness of the crockery, the temperature setting, and the amount of crockery in the drawer.
- Regularly maintain the drawer by removing dirt, grease, and food build-up. Replace the warming drawer silicon at least once per year, and avoid spilling water on or near the appliance or its power source.
In conclusion, understanding how to use the warming drawer on your GE oven can significantly enhance your cooking and dining experience. By following the steps and tips provided in this guide, you can make the most of this convenient feature and enjoy warm, delicious meals any time.
Frequently Asked Questions
Can I use the warming drawer to cook food?
No, the warming drawer is not designed for cooking food. It’s primarily used to keep already cooked food at a safe and warm serving temperature.
How long can I safely keep food in the warming drawer?
Ideally, food should not be kept in the warming drawer for more than 2-3 hours. Prolonged warming may affect the quality and safety of the food due to potential bacteria growth.
Can I store pots and pans in the warming drawer when it’s not in use?
It’s not recommended to store pots, pans, or any other items in the warming drawer. This can lead to damage or operational issues. Always keep the drawer empty and clean when not in use.
Can I use the warming drawer while the oven is in use?
Yes, the warming drawer can be used independently of the oven. However, ensure that the oven is turned off and cool before accessing the warming drawer to prevent burns or other injuries.
Does the warming drawer use a lot of electricity?
The warming drawer uses less electricity than the oven because it operates at much lower temperatures. However, like any appliance, it’s best to turn it off when not in use to conserve energy.

