Replacing a bathroom exhaust fan with light might seem like a daunting task, but with the right tools, instructions, and a bit of patience, you can accomplish it yourself. In this comprehensive guide, we will walk you through every step of the process, from identifying when your bathroom exhaust fan needs replacement to installing a new one and even troubleshooting common issues.
To replace a bathroom exhaust fan with light, first, turn off the power at the circuit breaker. Remove the old fan grille, disconnect the motor, and remove the fan housing. Choose a new fan based on your bathroom’s size and the fan’s CFM rating. Enlarge the hole in the ceiling if necessary, attach the new fan’s duct and housing, connect the wiring, install the fan, and secure it with screws. Turn the power back on, test the new fan and light, and install the cover if everything works correctly.
Signs Your Bathroom Exhaust Fan with Light Needs Replacement
Before we dive into the replacement process, it’s essential to know when your exhaust fan needs replacement. Here are some common signs:
- Loud Noise: If your exhaust fan is making more noise than usual, it could be a sign of a dying motor.
- Moisture Problems: If the air in your bathroom feels thick and stuffy, it’s a sign that your exhaust fan isn’t effectively removing moisture.
- Persistent Odors: If odors linger in your bathroom even with the exhaust fan running, it might be time for a replacement.
- Slow or Non-spinning Fan: If the fan is slow to start or doesn’t spin at the speed it once did, it’s time for a replacement.
- Burning Smell: A burning smell from the fan could indicate an electrical problem. Replace it immediately to avoid potential fire hazards.
- High Humidity Levels: Excessive humidity leading to issues like mold growth, peeling paint, or a stuffy atmosphere indicates a non-working exhaust fan.
Tools and Materials Required for Replacing a Bathroom Exhaust Fan with Light
To replace your bathroom exhaust fan with light, gather the following tools and materials:
- An easy-install bathroom fan model with light
- Ladder
- Measuring tape
- Circuit tester
- Screwdriver (flathead and Phillips)
- Drill
- Drill bits
- Jab saw or drywall saw
- Duct tape
- Drywall screws
- Cable clamp connector
- Wire connectors
- Spackling compound
- Paint
- Adjustable wrench
- Wire cutters
- Wire strippers
- Pliers
- Utility knife
- Stepladder
- Mounting brackets
- Electrical connectors
- Wire nuts
- Fan/duct adaptor
- 1-½” screws
Safe Removal of Old Bathroom Exhaust Fan
Before you start the replacement process, ensure that the power is turned off at the circuit breaker to avoid any electrical mishaps. Then, follow these steps to remove the old exhaust fan:
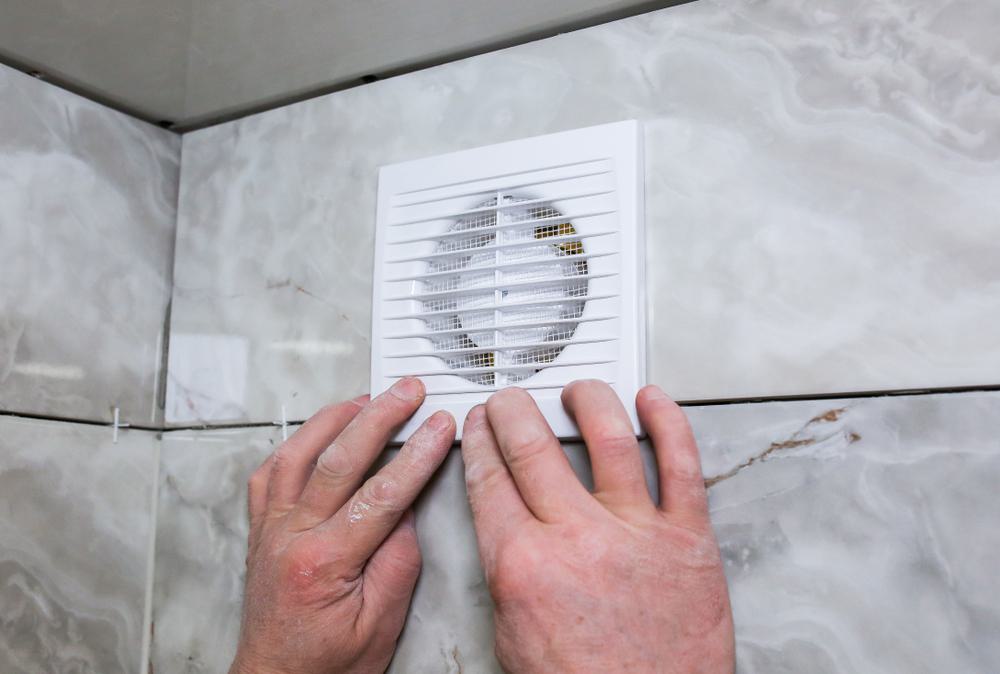
- Remove the Fan Grille: Unclip the old fan grille from the ceiling.
- Disconnect the Motor: Unplug the motor from the housing and disconnect the electrical wiring.
- Remove the Motor: Unscrew the motor from the housing and take it out.
- Remove the Damper: Remove the damper from the housing by unscrewing it and using a screwdriver to pry it out.
- Remove the Fan Housing: Bend the old fan housing inward and peel it back to expose the mounting brackets. Then, pry the housing loose from the joist.
Selecting the Right Type and Size of a New Bathroom Exhaust Fan with Light
When choosing a new bathroom exhaust fan with light, consider the size of your bathroom, the fan’s noise level, its energy efficiency, and its CFM (Cubic Feet per Minute) rating, which indicates how much air the fan can move. The Home Ventilating Institute recommends 1 CFM per square foot of bathroom area, with a minimum of 50 CFM for any size bathroom.
Installing the New Bathroom Exhaust Fan with Light
Once you’ve removed the old exhaust fan and selected a new one, it’s time to install it. Follow these steps:
- Prepare the Hole: If necessary, enlarge the hole in the ceiling to fit the new fan housing.
- Attach the Duct and Housing: Attach the new fan’s duct and secure the housing to the ceiling and joist.
- Connect the Wiring: Connect the wiring as per the manufacturer’s instructions.
- Install the Fan: Install the fan into the housing, making sure the fan’s outlet is aligned with the duct.
- Secure the Fan and Test: Secure the fan with screws, turn the power back on, and test the new fan and light.
- Install the Cover: If everything works correctly, install the cover.
Troubleshooting Common Issues
If the new bathroom exhaust fan with light doesn’t work as expected, here are some troubleshooting tips:
- Check the Circuit Breaker: Make sure the circuit breaker is turned on.
- Check the Wiring Connections: Make sure all the wiring connections are secure.
- Check the Fan and Light: Test the fan and light separately to see if one or both are not working.
Disposal of Old Electrical Wiring
Dispose of old electrical wiring responsibly. You can recycle, donate, or sell them. Never dispose of them in your regular trash or recycling bin, as they can cause environmental and safety hazards.
In conclusion, replacing a bathroom exhaust fan with light is a doable DIY project that can save you money and improve your bathroom’s comfort and safety. By following these steps carefully, you can accomplish this task smoothly and efficiently. However, if you’re uncomfortable with any step or feel unsafe working with electrical components, don’t hesitate to call a professional electrician. Remember, safety should always be your top priority.
Frequently Asked Questions
How much time does it usually take to replace a bathroom exhaust fan with light?
It largely depends on your experience with DIY projects, the complexity of the fan model, and the conditions of your bathroom. However, for an average person, it should take between 2 to 4 hours.
Can I replace my bathroom exhaust fan with light with a fan model that doesn’t include a light?
Yes, you can replace your bathroom exhaust fan with light with a fan-only model. However, you’ll need to ensure that your bathroom has sufficient light from other sources.
What should I do if the new hole required for the new fan is larger than the old one?
In such cases, you can use a jab saw or drywall saw to enlarge the hole. Be sure to measure carefully and cut only as much as necessary to avoid unnecessary repair work.
What should I do if the new fan is smaller than the original hole in the ceiling?
If the new fan is smaller, you can use a piece of drywall to fill in the excess space. Cut the drywall to the correct size, secure it with screws, and then seal the seams with spackling compound and paint.
Is it safe to replace a bathroom exhaust fan with light by myself?
Yes, it’s generally safe if you follow all safety precautions, especially turning off the power at the circuit breaker before starting the work. However, if you’re not comfortable with electrical work, it’s best to hire a professional.


