Installing a Whirlpool microwave might seem like a daunting task, but with the right tools, preparation, and step-by-step guidance, it’s a task that you can accomplish on your own. This comprehensive guide will walk you through the process of installing your Whirlpool microwave, ensuring a safe and secure fit, and providing you with tips and troubleshooting solutions along the way.
To install a Whirlpool microwave, first prepare a clean and clutter-free workspace. Locate and mark the studs on the wall using a stud finder. Mount the bracket on the marked locations and ensure it is level. With the help of another person, lift and attach the microwave to the mounting plate. Connect the microwave to the power source and test to ensure it’s working correctly. Always refer to your microwave’s installation guide for specific instructions.
Preparing for Installation
Before you begin the installation process, make sure you have a clean and clutter-free workspace. You’ll need a minimum of 30 inches of space between the side cabinets and a minimum 12-inch depth from the front of the cabinets to the rear wall. Gather the necessary tools, which typically include a drill, level, stud finder, pencil, and measuring tape.
Locate the studs using a stud finder and mark these locations on the wall. Your mounting plate will be secured here. Use a level to ensure the marks are straight.
Mounting the Bracket
The mounting plate is an essential component in the installation process. Place the mounting plate against the wall, aligning it with the marked stud locations. Use a level to ensure the mounting plate is level. Then, drill holes into the wall studs and attach the mounting plate to the wall using the appropriate screws. Make sure the mounting plate is securely fastened and level.
Attaching the Microwave
With the help of another person, lift the microwave and align its back with the mounting plate. Slide the microwave onto the mounting plate, ensuring it is securely attached. Insert the mounting bolts through the holes in the upper cabinet and into the microwave. Tighten the bolts to secure the microwave in place. Once the microwave is installed, use a level to ensure it is properly leveled. If necessary, make adjustments to the mounting plate or microwave to achieve the correct level.
Connecting to Power Source
Next, connect the microwave to the power source. Make sure the power cord is securely attached to the microwave and the plug is fully inserted into the electrical outlet. Once the microwave is plugged in, check the digital display, clock, and timer to ensure they are functioning.
Testing the Microwave
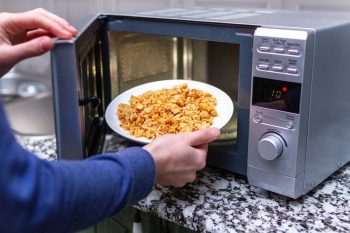
Test the microwave to ensure it’s working correctly. Set the microwave to cook for a short period, such as 30 seconds, and observe if the microwave starts, the turntable rotates, and the timer counts down. You can also check the exhaust fan (if applicable) and inspect the door seal.
Troubleshooting Common Issues
If you encounter any issues during the installation process, there are a few common problems and solutions you can consider. If the microwave doesn’t turn on, check the power source. If the microwave isn’t heating, the magnetron might be faulty and you should call for service. If the turntable isn’t rotating, the turntable motor might need to be replaced.
Conclusion
Installing a Whirlpool microwave is a manageable task with the right tools and guidance. By following these steps and precautions, you can ensure a safe and successful installation. Always consult your microwave’s installation guide for specific instructions and safety precautions, and consider hiring a professional if you’re unsure about any steps or encounter any issues.
Frequently Asked Questions
What tools do I need to install a Whirlpool microwave?
You’ll need a drill, level, stud finder, pencil, and measuring tape.
How much space do I need to install a Whirlpool microwave?
You need a minimum of 30 inches of space between the side cabinets and a minimum 12-inch depth from the front of the cabinets to the rear wall.
What is the mounting plate and why is it important?
The mounting plate is a crucial component used to attach the microwave to the wall. It ensures the microwave is securely fastened and level.
How do I know if my microwave is installed correctly?
After installation, the microwave should be level and securely attached to the mounting plate. You can also test it by setting it to cook for a short period and checking if the turntable rotates and the timer counts down.
What should I do if the microwave doesn’t turn on or isn’t heating?
If the microwave doesn’t turn on, check the power source. If it isn’t heating, there might be an issue with the magnetron and you should call for service.
Can I install a Whirlpool microwave by myself?
Yes, you can install a Whirlpool microwave by yourself. However, it’s recommended to have someone assist you when lifting the microwave and attaching it to the mounting plate. If you’re unsure about any steps, consider hiring a professional.


