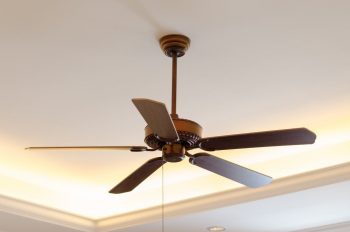
Hanging a ceiling fan with a light is an excellent way to enhance the aesthetic appeal and comfort of your home. However, it can seem like a daunting task if you’re not sure where to begin. This comprehensive guide will walk you through the step-by-step process of hanging a ceiling fan with light, highlight the common pitfalls to avoid, provide maintenance tips for longevity, and suggest the best cleaning tools for your ceiling fan.
Hanging a ceiling fan with light involves preparing for installation by gathering the necessary tools and materials, and preparing the installation area. Next, mount the ceiling fan bracket and junction box. Then, connect the wiring for the ceiling fan with light. After wiring, attach the fan blades and light fixture. Finally, perform checks to ensure the ceiling fan with light is securely installed and operating correctly.
Preparing for Installation
Before embarking on the installation process, ensure you have all the necessary tools and materials. These include a ceiling fan with light kit, ladder, wire cutters/strippers, circuit tester/voltage detector, adjustable wrench, pliers, screwdrivers, mounting hardware, wire connectors, and a fan-rated electrical box.
Next, safely prepare the installation area. Turn off the power supply to the room at the circuit breaker, clear the installation area, and ensure the electrical box is rated for ceiling fan use. Take accurate measurements of the room to select the appropriately sized fan, and gather the necessary tools.
Mounting the Ceiling Fan Bracket and Junction Box
Once you’ve prepared your installation area, it’s time to mount the ceiling fan bracket and junction box. Carefully remove the existing light fixture and the old junction box if it’s not rated for a ceiling fan. Install a ceiling fan brace for added support, followed by the U-bolt bracket and fan-rated junction box. Lastly, install the ceiling fan bracket.
Wiring the Ceiling Fan and Light
The next step is to connect the wiring for the ceiling fan with light. This involves connecting the fan wires to your household wiring, typically black (hot for the fan), blue (hot for the light), white (neutral), and green (ground). Secure all connections with wire nuts and follow the wiring diagram provided with your specific fan model for detailed instructions.
Attaching Fan Blades and Light Fixture
After wiring the fan and light, attach the fan blades to the motor. Install the light fixture by connecting the wires from the fan motor to the wiring in the lights. Attach the light fixture to the fan motor to secure it in place.
Final Checks
After the installation process, perform the final checks to ensure the ceiling fan with light is securely installed and operating correctly. Verify that the fan operates on all speed settings and that the lights turn on and off independently.
Maintenance Tips
To ensure longevity and optimal performance, maintain your ceiling fan with regular dusting, lubricating moving parts, tightening loose screws, checking electrical connections, and replacing worn parts.
Cleaning Tools
For cleaning, consider using a microfiber cloth, Blade Maid Ceiling Fan Cleaner, Unger Ceiling Fan Duster, Quickie Microfiber Ceiling Fan Cleaner, or EVERSPROUT Flexible Microfiber Ceiling & Fan Duster. These tools are designed to effectively clean your ceiling fan with light.
Conclusion
Hanging a ceiling fan with light doesn’t have to be intimidating. By following these detailed steps, avoiding common mistakes, and maintaining your fan regularly, you can enjoy the comfort and aesthetic appeal that a ceiling fan with light brings to your home.
Frequently Asked Questions
What safety measures should I take before starting the installation process?
Before starting the installation process, ensure that you have turned off the power supply to the room at the circuit breaker. Always double-check with a circuit tester or voltage detector to confirm that there is no power flowing in the wires you’re about to work with. Also, clear the installation area of any obstacles and use a sturdy, reliable ladder.
How do I know if my electrical box is rated for a ceiling fan?
An electrical box rated for a ceiling fan is usually labeled as such. These boxes are designed to support the weight and vibration of a fan. If you’re unsure, it’s best to replace the existing box with a fan-rated one to ensure safety.
What should I do if my ceiling fan wobbles after installation?
A wobbling ceiling fan may indicate that the fan blades are not balanced. Most ceiling fan kits come with a balancing kit. Follow the instructions provided in the kit to balance the fan blades. If this doesn’t work, double-check that the fan is securely fastened to the ceiling.
How often should I perform maintenance on my ceiling fan with light?
It’s recommended to dust your ceiling fan at least once a month. Check for loose screws, electrical connections, and worn parts every 3-6 months. Lubricate moving parts as per the manufacturer’s instructions, which is usually once a year.
Can I install a ceiling fan with light if my ceiling is sloped?
Yes, you can install a ceiling fan with light on a sloped ceiling. However, you may need a special mounting bracket or a downrod extension, which are usually sold separately. Always check the manufacturer’s instructions for specifics.


