A fridge water line is a crucial component of your refrigerator, especially if it comes equipped with an ice maker and water dispenser. This flexible tube, typically made of copper, plastic, or stainless steel, connects your refrigerator to a water source, providing a continuous supply of water. According to Consumer Reports, 21% of refrigerator models have issues with dispensing ice or water, while 14% have problems making ice. Therefore, understanding how to properly turn on and maintain your fridge water line is essential.
To turn on the fridge water line, start by turning off the cold water supply. Connect a tee fitting or saddle valve to the cold water supply line. Measure and cut the refrigerator water line, and run it from the tee fitting to the refrigerator. Attach the water line to the refrigerator’s water line inlet, tightening the nut with a wrench. Finally, turn on the water supply and check for any leaks, tightening as needed.
What You’ll Need
Before you begin, gather the necessary tools and materials:
- A refrigerator water line kit (includes a supply line and necessary fittings)
- A tee fitting or saddle valve for connection to the cold water supply
- A wrench or adjustable wrenches for tightening connections
- A pipe cutter or tubing cutter for cutting the water line
- A deburring tool or file for smoothing cut edges of the tubing
- A tape measure for accurate measurements
- A power drill for drilling holes, if necessary
Step-by-Step Instructions
- Turn off the cold water supply – Locate the fixture shutoff valve on the cold water supply line, usually under the kitchen sink, and turn it off.
- Connect the tee fitting or saddle valve – Attach the tee fitting or saddle valve to the cold water supply line.
- Measure and cut the refrigerator water line – Use your tape measure to determine the appropriate length of the tubing. Cut the tubing to this length, adding extra slack to allow for movement of the fridge.
- Run the tubing – From the tee fitting or saddle valve, run the tubing to the refrigerator. Drill holes through cabinets or walls as needed.
- Connect the water line to the refrigerator – Attach the water line to the refrigerator’s water line inlet, tightening the nut with a wrench.
- Turn on the water supply – Check for leaks at all connection points, tightening as needed.
Troubleshooting Common Issues
Like any other appliance, you might encounter some issues when trying to turn on the fridge water line. Here are some common problems and their solutions:
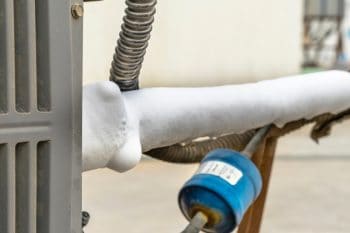
- Frozen water supply tube – Adjust the freezer temperature to between 0 to 10 degrees Fahrenheit to thaw it out.
- Clogged or dirty water filter – Replace the water filter if it’s clogged or dirty. Most filters need to be replaced every six months.
- Blocked or frozen water line – Check for kinks or bends in the water lines that could slow the flow of water. If the water line is frozen, allow it to defrost.
- Damaged water inlet valve – If the water inlet valve is clogged or broken, test it for continuity using a multimeter tool. If it doesn’t have continuity, replace it.
- Low water pressure – Ensure that the water pressure is at least 20 psi for the water inlet valve to function properly. Insufficient water flow can be caused by substandard plumbing or buildup in pipes.
- Faulty dispenser switch – Test the dispenser switches for continuity using a multimeter tool. If they lack continuity, replace them.
- Water dispenser control board issues – Test each dispenser component before replacing the entire control board. If the whole dispenser system is not working, the control board may be responsible.
Maintenance and Safety Precautions
Once you’ve successfully turned on your fridge water line, it’s important to maintain it for optimal performance. Regularly check for any leaks, clogs or damage, and replace any worn-out parts as necessary. When handling the water line, always turn off the water supply to prevent water damage and potential injury.
Conclusion
Turning on the fridge water line is a manageable DIY project that can be done by a novice, given the right tools and guidance. However, if you encounter any difficulties or feel uncomfortable performing the task, don’t hesitate to seek professional help. Remember: your safety and the proper functioning of your refrigerator are paramount.
Frequently Asked Questions
What is a saddle valve?
A saddle valve is a device that allows you to tap into an existing water line, usually a copper pipe, without having to cut and solder the pipe. It’s called a “saddle” valve because it clamps onto the pipe like a saddle on a horse.
Can I use any type of tubing for the fridge water line?
It’s highly recommended to use the type of tubing specified by your refrigerator manufacturer. This is typically copper, plastic, or stainless steel tubing.
How often should I check my fridge water line for leaks?
It’s a good practice to check your fridge water line for leaks every six months. However, if you notice any changes in the water pressure or quality, you should check it immediately.
Is it safe to drill holes through cabinets or walls for the water line?
Yes, it is safe as long as you are careful to avoid any electrical wiring or other plumbing. Make sure you know what is behind the wall or cabinet before you start drilling.
What should I do if the water tastes funny after turning on the water line?
If the water tastes strange, it could be due to a new water line or a new filter. Try running several gallons of water through the system to flush it out. If the taste persists, it might be time to replace the water filter.


