Electrical outlets are a crucial part of our everyday lives. We use them to power our appliances, charge our devices, and light up our homes. But what happens when an outlet stops working? In this comprehensive guide, we’ll walk you through the steps to fix a broken electrical outlet and provide you with tips to prevent future problems.
To fix a broken electrical outlet, first turn off the power at the circuit breaker. Unscrew the cover plate and use a voltage tester to ensure the outlet is not powered. Unscrew the receptacle and remove the wires. Prepare a new receptacle and attach the wires to the correct terminals. Push the new receptacle back into the wall, replace the cover plate, and turn the power back on. Always consult a professional electrician if you are unsure or if there are signs of severe damage.
Signs of a Broken Electrical Outlet
Before we jump into the repair process, it’s important to identify the common signs of a broken electrical outlet. They include:
- Discolored or melted plastic: This can result from excess heat, short-circuiting, and damaged wires.
- Smoke, sparks, or burning odors: These are dangerous fire hazards and could be the result of water damage or a short circuit.
- Outlet cover feels hot: A hot outlet cover indicates that the outlet is malfunctioning and could pose a risk.
- Burn marks or melting: Dark discoloration and melting on the faceplate, outlets, and wall are signs of a bad outlet.
- Chips or cracks in the faceplate: Even minor fissures or cracks can indicate a problem with the outlet.
- Plugs keep falling out: Loose plugs can be a sign of worn-out slots in the outlet.
- Tripped circuit breakers: A bad outlet can sometimes cause circuit breakers to trip, affecting other outlets as well.
If you notice any of these signs, it is important to consult a professional electrician to diagnose and fix the issue.
Safety Precautions
Safety is paramount when dealing with electricity. Here are some crucial safety precautions to take before attempting to fix a broken electrical outlet:
- Turn off the power: Before working on an outlet, turn off the circuit breaker on the service panel. This will ensure that there is no electricity flowing to the outlet while you are working on it.
- Test the outlet: Use a voltage tester to double-check that the outlet is not powered. This will help confirm that you have turned off the correct circuit breaker and that it is safe to work on the outlet.
- Inspect the outlet: Check for any visible damage, such as cracks, chipping, or exposed wires.
Tools Required
To repair a broken electrical outlet, you will need the following tools:
- Flat-head screwdriver
- Phillips head screwdriver
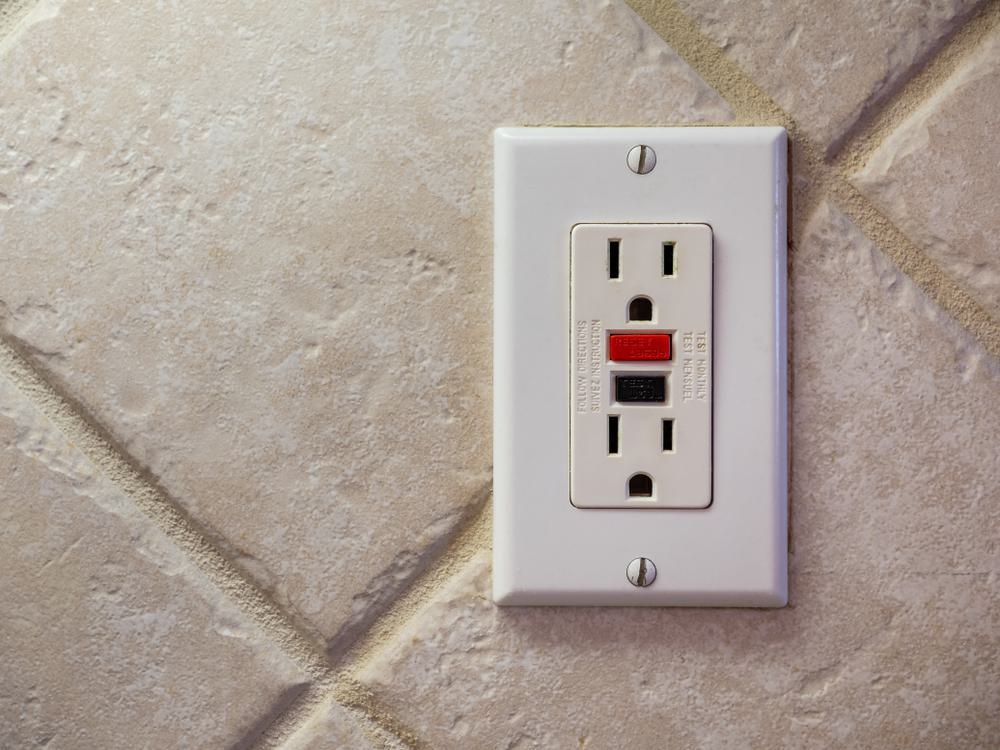
- Replacement outlet (15 amp, 20 amp, or GFCI)
- Voltage tester
- Wire strippers/cutters
- Needle-nose pliers
- Electrical tape
- New outlet plate (optional)
Step-by-Step Guide to Fixing a Broken Electrical Outlet
Now that we’ve covered the basics, let’s dive into the step-by-step process of fixing a broken electrical outlet.
- Turn off the power: Locate the circuit breaker for the outlet and turn it off. This is crucial for your safety.
- Unscrew the cover plate: Use a screwdriver to remove the screws holding the cover plate in place.
- Test the circuit: Use a non-contact voltage tester to ensure there is no electricity flowing through the outlet.
- Unscrew the receptacle: Remove the screws holding the receptacle in place and gently pull it out of the wall.
- Remove the wires: Unscrew the wires connected to the receptacle. Inspect the wires for any damage.
- Prepare the new receptacle: If the wires are damaged, cut off the damaged ends and strip about an inch of insulation to expose fresh wire.
- Attach wires to the new receptacle: Insert the wires into the appropriate holes or terminals on the new receptacle and tighten the screws to secure them. You can also wrap the outlet in electrical tape for added safety.
- Push the receptacle back into the wall: Carefully push the new receptacle back into the wall and screw it in place.
- Screw the cover plate back on: Replace the cover plate and secure it with screws.
- Turn the power back on: Turn the circuit breaker back on and test the electrical outlet to ensure it’s working properly.
Remember, safety is of the utmost importance when working with electrical components. If you feel unsafe or unsure at any point, it’s best to consult a licensed electrician.
Common Mistakes to Avoid
When fixing a broken electrical outlet, it’s important to avoid common mistakes that could lead to further problems or safety hazards. Here are some to watch out for:
- Not testing for power: Always use a voltage tester to confirm that there’s no power running to the outlet before you start working.
- Connecting wires to the wrong terminals: The black (hot) wire should be connected to the brass terminal, the white (neutral) wire to the silver terminal, and the bare (ground) wire to the green terminal.
- Loose connections: Make sure all wires are securely attached to their respective terminals to prevent sparking and overheating.
- Using a damaged outlet: If an outlet is visibly damaged, it should be replaced, not repaired.
- Not turning off the power: Always turn off the power at the circuit breaker before working on an electrical outlet.
When to Consult a Professional Electrician
If you’re unsure about any step of the process, it’s best to consult a professional electrician. Other instances when you should call a professional include:
- The outlet is damaged beyond repair.
- There’s rust or moisture near the outlet.
- The outlet is not working despite your attempts to fix it.
- The outlet cover is hot to the touch.
- There are visible sparks or a burning smell coming from the outlet.
Maintaining Your Electrical Outlets
To prevent future issues with your electrical outlets, it’s important to maintain them properly. Here are some tips:
- Regularly test your outlets: This will help you catch any potential issues early.
- Replace old or damaged outlets: Outlets that are old or show signs of damage should be replaced immediately.
- Avoid overloading outlets: Overloading an outlet can cause it to overheat and potentially cause a fire.
- Keep water away from outlets: Water and electricity do not mix. Always keep your outlets dry to prevent electrical shocks or fires.
By following this comprehensive guide, you’ll be able to safely and effectively fix a broken electrical outlet in your home. However, if you’re ever in doubt, it’s always best to consult with a professional electrician.
Frequently Asked Questions
What is a GFCI outlet and when should I use it?
A GFCI (Ground Fault Circuit Interrupter) outlet is a special type of outlet designed to protect against electric shock. It’s recommended to use GFCI outlets in areas where water and electricity may come into contact, such as bathrooms, kitchens, laundry rooms, and outdoors.
How can I tell which circuit breaker corresponds to the outlet I’m trying to fix?
One way to determine this is by plugging a lamp or radio into the outlet, then turning off circuit breakers one by one until the device turns off. The circuit breaker that caused the device to turn off is the one that controls the outlet.
Do I need to replace the entire outlet if only one of the two plug-in slots is not working?
Yes, if one of the slots is not working, it’s best to replace the entire outlet. This is because the two slots share internal components, and a problem with one can indicate a problem with the other.
How often should I replace my electrical outlets?
There’s no hard and fast rule for how often to replace outlets, as it depends on their usage and environment. However, if an outlet is more than 15-20 years old, you may want to consider replacing it. Always replace outlets that show signs of wear or damage.
What is the difference between a 15 amp and 20 amp outlet?
The main difference between a 15 amp and a 20 amp outlet is the amount of electricity they can handle. A 20 amp outlet can handle more electrical load than a 15 amp outlet. You’ll also notice a physical difference; a 20 amp outlet has one slot that is turned sideways or T-shaped. Always replace an outlet with one of the same amperage.


